Dampeer is the last HoN(Heroes of Newerth) Hero released by S2Games. They provided on their YouTube Channel a really nice Dampeer Hero Guide as a Hero Spotlight where you have basic knowledge of what Dampeer can do( for sure he can do a lot!) and how to play him.
In this Dampeer Hero Guide you will see what skills this hero has and the recommended item/skill builds to make. So if you wonder what items are good for Dampeer or how to play him, watch this video to have an idea.
If well played Dampeer is an OP hero. His Lifesteal abilities can turn a run for your life into a easy kill even if you are running on less them half life and you enemy is almost full life! The combination of Vampiric Flight (damage+lifesteal) and Terrorize(damage+"enemy running around") can really turn a gank around giving you a fast kill.
As stupid as this can sound, Dampeer is one of the few heroes(can only think of chipper to get massive farm on a huge/"staked" creep wave) where using you ultimate on creeps is actually a good thing to do. Doing it if you are farming for a bit is a really good idea since for every essence you get you are improving your skills.
Will make a full guide / tutorial when I have time and more knowledge about this hero.
If you have any improvements or tips just post them below on comment. Thanks
Wednesday, February 16, 2011

Myrmidon Basic Hero Guide - Heroes of Newerth(HON) Tutorial
Myrmidon is one of the latest HoN(Heroes of Newerth) Hero released by S2Games. They provided on their YouTube Channel a pretty nice Myrmidon Hero Guide as a Hero Spotlight where you have basic knowledge of what Myrmidon can do and how to play him.
In this Myrmidon Hero Guide you will see what skills this hero has and the recommended item/skill builds to make. So if you wonder what items are good for Myrmidon or how to play him, watch this video to have an idea.
Myrmidon is a ganker by nature, all his spells are prepared to immobilize and damage enemy heroes.It is very important that you do the right items on early/mid game so that you can stand a chance as semi-carry at mid/late game. Myrmidon may be an intelligence hero but when you cast his ultimate you are going for a melee stand combat. So remember, don´t go into the middle of a fight without proper health and armor.
Will make a full guide / tutorial when I have time and more knowledge about this hero.
If you have any improvements or tips just post them below on comment. Thanks
In this Myrmidon Hero Guide you will see what skills this hero has and the recommended item/skill builds to make. So if you wonder what items are good for Myrmidon or how to play him, watch this video to have an idea.
Will make a full guide / tutorial when I have time and more knowledge about this hero.
If you have any improvements or tips just post them below on comment. Thanks
Tuesday, February 15, 2011
Gladiator Hero Guide - Heroes of Newerth(HON) Item & Skill Builds-II
Starting Items
 x3 to build into a Power Supply / sell
 for extra health and to make into a Fortified Cracelet
 x2 for health regen
 quick health regen
Early Game
 More health
 Help with the mana
 From the side shop
 If you need the extra regen (i would not recommend this. You shall better start your riftshards or end your Phase Boots)
Mid game
 Lets you chase and increases your damage
 Gives you good damage with an easy build up and if you are lucky the splash from Flagellation will be a crit for lots of AOE damage. Getting lvl 1 and lvl it up for 4 after getting a damage item(Runed Axe) would be the ideal
 Gives you good mobility and the bonus damage splashes.(if you are lucky enough to get a crit combined with Assassins damage bonus you can easily take half life or more from an enemy hero depending on Riftshards level).
 Gives you more splash, mana and health regeneration for easy farming. (this is an item you MUST have if you are having trouble with farming. But either way it will still help you with Flagellation damage due to his +65 damage bonus).
Luxury Items
Savage Mace - Gives you bigger splashes
Demonic Breastplate - Gives you some armor and attack speed.
Doombringer - this is just for the lulz on pub games. Riftshards + Doombringers + Runed Axe + Flagellation.. just imagine the outcome :D.
Laning:
Gladiator should play on bot lane(Legion) top lane (Hellbourne) to take maximum advantage of his arras with the whip.
In lane, your main goal is to deliver lasthits where possible, and harassing enemies with Flagellation. If no creep is within a recognisably low amount of health, you should go inside of fog for a short timeor try the H trick to scare your enemies . When you're in the fog as Gladiator people start to act erratically, and this is general is just good for mindgames. If you see an oppurtunity to land a Pitfall, do so. If there isn't much of a way to follow up on a landed stun, simply whip a creep. A whip and Pitfall will do about 250 damage, and is a good bit of harassment necessary to winning lanes. You will in almost all cases be the secondary intiator. Pitfall is extremely unreliable for landing stuns, so you will want your ally to slow or stun the enemy enough that you can guarantee your Pitfall.
Ganking:
Ganking with Gladiator is all about landing Pitfalls, and that is mostly practice. Pitfall is best used either:
Timing of ganking is pretty general of all semi-carries. Take farm when you can, push lanes for map control and carry Homecoming Stones at all times for counter-gank opportunities. You can't initiate ganks very effectively without Showdown. Gladiator's strengths is in area of effect burst, and not so much single target burst. So without adequate support it isn't worth taking your time to gank a lone enemy carry by yourself. Your best bet is to either try to harass them out of lane or to go farm yourself to compete with them.
Team fights:
Line up your whips properly. This is extremely important for any teamfight, since once you have a few items your whip is dealing the majority of your damage. There is no point having a tonne of items if your whip only hits 2 heroes, the area of effect is huge. If you have the opportunity to, whip a creep instead of a hero. The only person who takes armor reduced damage is your main target, and if that target is a creep you're optimising your output. Try not to be in centre of teamfights while your skills are on cooldown. Gladiator's autoattack damage is pretty bad, and unless you're at a huge advantage in the fight maintaining good position is generally more beneficial than getting in 2 autoattacks. Whit this i don't to say that you can't maintain good positioning and hit enemy heroes at the same time...
The rest is all about timing.. some times a good ultimate is not only the one that hits the enemy hero but the one that prevents a nuke. Remember that Call to Arms Buffs your allies for 5/6/7 seconds ("damage taken is halved.Prevented damage is taken all at once at the end of the buff and is nonlethal.").
For a more detailed guide you shall look for RogerDodger's gladiator guide. Took a lot of inspiration from his guide to make this one.
To end this guide will leave just some amazing videos from what a good whip can do ;)
x3 to build into a Power Supply / sell for extra health and to make into a Fortified Cracelet x2 for health regen quick health regenEarly Game
More health Help with the mana From the side shop If you need the extra regen (i would not recommend this. You shall better start your riftshards or end your Phase Boots)Mid game
Lets you chase and increases your damage Gives you good damage with an easy build up and if you are lucky the splash from Flagellation will be a crit for lots of AOE damage. Getting lvl 1 and lvl it up for 4 after getting a damage item(Runed Axe) would be the ideal Gives you good mobility and the bonus damage splashes.(if you are lucky enough to get a crit combined with Assassins damage bonus you can easily take half life or more from an enemy hero depending on Riftshards level). Gives you more splash, mana and health regeneration for easy farming. (this is an item you MUST have if you are having trouble with farming. But either way it will still help you with Flagellation damage due to his +65 damage bonus).Luxury Items
Savage Mace - Gives you bigger splashes
Demonic Breastplate - Gives you some armor and attack speed.
Doombringer - this is just for the lulz on pub games. Riftshards + Doombringers + Runed Axe + Flagellation.. just imagine the outcome :D.
Game Play:
Laning:
Gladiator should play on bot lane(Legion) top lane (Hellbourne) to take maximum advantage of his arras with the whip.
In lane, your main goal is to deliver lasthits where possible, and harassing enemies with Flagellation. If no creep is within a recognisably low amount of health, you should go inside of fog for a short timeor try the H trick to scare your enemies . When you're in the fog as Gladiator people start to act erratically, and this is general is just good for mindgames. If you see an oppurtunity to land a Pitfall, do so. If there isn't much of a way to follow up on a landed stun, simply whip a creep. A whip and Pitfall will do about 250 damage, and is a good bit of harassment necessary to winning lanes. You will in almost all cases be the secondary intiator. Pitfall is extremely unreliable for landing stuns, so you will want your ally to slow or stun the enemy enough that you can guarantee your Pitfall.
Ganking:
Ganking with Gladiator is all about landing Pitfalls, and that is mostly practice. Pitfall is best used either:
- From fog
- When the enemy has nowehere else to go
- When the enemy is disabled
- After Showdown
Timing of ganking is pretty general of all semi-carries. Take farm when you can, push lanes for map control and carry Homecoming Stones at all times for counter-gank opportunities. You can't initiate ganks very effectively without Showdown. Gladiator's strengths is in area of effect burst, and not so much single target burst. So without adequate support it isn't worth taking your time to gank a lone enemy carry by yourself. Your best bet is to either try to harass them out of lane or to go farm yourself to compete with them.
Team fights:
Line up your whips properly. This is extremely important for any teamfight, since once you have a few items your whip is dealing the majority of your damage. There is no point having a tonne of items if your whip only hits 2 heroes, the area of effect is huge. If you have the opportunity to, whip a creep instead of a hero. The only person who takes armor reduced damage is your main target, and if that target is a creep you're optimising your output. Try not to be in centre of teamfights while your skills are on cooldown. Gladiator's autoattack damage is pretty bad, and unless you're at a huge advantage in the fight maintaining good position is generally more beneficial than getting in 2 autoattacks. Whit this i don't to say that you can't maintain good positioning and hit enemy heroes at the same time...
The rest is all about timing.. some times a good ultimate is not only the one that hits the enemy hero but the one that prevents a nuke. Remember that Call to Arms Buffs your allies for 5/6/7 seconds ("damage taken is halved.Prevented damage is taken all at once at the end of the buff and is nonlethal.").
For a more detailed guide you shall look for RogerDodger's gladiator guide. Took a lot of inspiration from his guide to make this one.
To end this guide will leave just some amazing videos from what a good whip can do ;)
Monday, February 14, 2011
Gladiator Hero Guide - Heroes of Newerth(HON) Item & Skill Builds-I
If you played DotA and remember Admiral Kunkka, you should have an idea how to play Gladiator in HoN. Gladiator is not an easy hero to play.You can easly miss Pitfall and Call to Arms so to own with it you must have skill a practice on your side. This Gladiator tutorial should give you the basics of how to play this hero.

Gladiator role in team will be as initiator, ganker and semi-carry. So in great part the development of the game will be your responsibility so you need to be always in the right place at the right time. As your initiation skills (Pitfall and Call to Arms) depend on your on your good fore-sight and positioning skills it is very important that you don't screw it up.
As Gladiator has some particularly difficult Spells/Skills i will give close attention at describing them.
Pitfall


It is very similar to Deadwood's Rotten Grasp, this skill if of a great importance, dealing both a stun and slow combined with considerable damage. The negative part is that it is pretty difficult to land accurately, having a delay of 2 seconds, it's very easy for opponents to dodge if they see it coming.
While farming creeps it is important to remember that the damage is not dealt instantly,half is dealt on impact and the other half during "flight-duration"
Tips: When in lane cast your pitfall then press H to stop the actual cast. Gladiator will move his sword as if casting and the enemy team will run around trying to dodge it.
After you do this enough times in lane, you will be able to cast it giving the opponents 2nd toughs about if you are just bluffing again. ( good players will still try to dodge, but it will for sure make your life easier since they cant last hit and run at the same time. ) ;)
Showdown

On mid/late game (since you wont be picking this skill on early game) you can combine it with Pitfall priding a sure hit. When Showdown is casted you will be able to also cast I Have no Patience giving you the opportunity to instantly port back the unit affected by Showdown at the cost of 50 mana.
Flagellation

Here is (in my opinion) one of the best AOE/passive attacks of the game. If you have a well equipped Gladiator this attack can cause massive damage.
Lets see how exactly this works.
When you whip a target, an invisible gadget is placed 380 / 420 / 460 / 500 in front of you. That gadget will deal the damage in a circle with a radius of 380 / 420 / 460 / 500 units. This means that in a straight line the whip will have 760 / 840 / 920 / 1,000 range. The damage done by the gadget is True damage, and cannot be blocked by Physical or Magic Immunity. The main target is not hit by this gadget; the damage that the main target takes is physical damage, just like a regular auto attack.
The amount of damage inflicted by the gadget is equal to Gladiator's attack damage. When you whip a target, your attack damage is increased by 15 / 30 / 45 / 60. A Logger's Hatchet will not affect the damage, not even to the main target. Attack modifiers and bonus damage from Manaburn, Savage Mace (and Halberds) will still apply to the main target, but not to any other targets. Any attack modifiers are placed on the main target as per a regular auto attack. The damage that the main target takes (depedent on the target's armour) does not affect the amount of damage that the gadget inflicts. Bonus damage from Assassin's Shroud increases your attack damage, and will apply to all targets. Critical damage from Rfitshards multiplies your attack damage by its multiplicand, and will apply to all the targets.
Call to arms

The Chariot moves at 750ms, and it will always travel 2000 units. This means that the delay until the Chariot reaches its destination is 2.66 seconds. The Chariot will always travel to exactly 1000 units in front of where you were when you casted it.

This means that if enemies are all up in your face, it's going to be difficult to target them with it. This is why good positioning is extremely important with Gladiator, if the enemy gets the jump on you your skills will be a lot less effective (the same could be said of all initiators).
Gladiator Skill build:
Part II (Item Build)
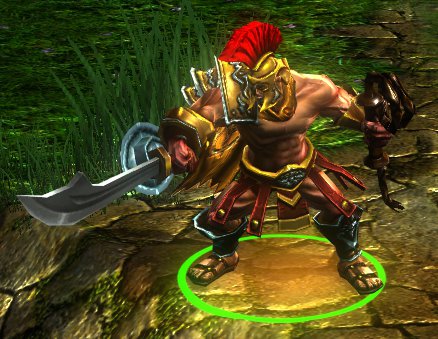
Gladiator role in team will be as initiator, ganker and semi-carry. So in great part the development of the game will be your responsibility so you need to be always in the right place at the right time. As your initiation skills (Pitfall and Call to Arms) depend on your on your good fore-sight and positioning skills it is very important that you don't screw it up.
As Gladiator has some particularly difficult Spells/Skills i will give close attention at describing them.
Pitfall
Type: Magic
Range: 1,500
Radius: 225
Cast Time: 1.0 Seconds
Mana Cost: 120
Cooldown: 12.0 Seconds
Required Level: 1 / 3 / 5 / 7
Activation
After a 2 second delay, any target in the radius takes 120 / 180 / 240 / 300 Magic damage while thrown in the air and then has Spiked! applied to them for 1 / 2 / 3 / 4 seconds.
Spiked! Effects
30% Movement Slow

It is very similar to Deadwood's Rotten Grasp, this skill if of a great importance, dealing both a stun and slow combined with considerable damage. The negative part is that it is pretty difficult to land accurately, having a delay of 2 seconds, it's very easy for opponents to dodge if they see it coming.
While farming creeps it is important to remember that the damage is not dealt instantly,half is dealt on impact and the other half during "flight-duration"
Tips: When in lane cast your pitfall then press H to stop the actual cast. Gladiator will move his sword as if casting and the enemy team will run around trying to dodge it.
After you do this enough times in lane, you will be able to cast it giving the opponents 2nd toughs about if you are just bluffing again. ( good players will still try to dodge, but it will for sure make your life easier since they cant last hit and run at the same time. ) ;)
Showdown
Type: Magic
Range: 500 / 650 / 800 / 950
Cast Time: 1.0 Seconds
Mana Cost: 80 / 90 / 100 / 110
Cooldown: 30.0 Seconds
Required Level: 1 / 3 / 5 / 7
Activation
Summons a Colosseum at the target’s location and applies Challenged to Fight to them for 1 / 2 / 3 / 4 seconds.
Ability is replaced with “I Have No Patience” for the duration.
Challenged to Fight Effects
Will be ported back to the Colosseum after 1 / 2 / 3 / 4 seconds
On mid/late game (since you wont be picking this skill on early game) you can combine it with Pitfall priding a sure hit. When Showdown is casted you will be able to also cast I Have no Patience giving you the opportunity to instantly port back the unit affected by Showdown at the cost of 50 mana.
Flagellation
Cooldown: 16.0 / 12.0 / 8.0 / 4.0 Seconds
Required Level: 1 / 3 / 5 / 7
On Attack
Grants 15 / 30 / 45 / 60 bonus damage.
When attacking enemy units, applies 100% True damage splash in a 380 / 420 / 460 / 500 AOE and triggers cooldown.
Attacking Towers or Buildings will not trigger the splash but will trigger the cooldown. Attacking allied units will trigger neither.
Here is (in my opinion) one of the best AOE/passive attacks of the game. If you have a well equipped Gladiator this attack can cause massive damage.
Lets see how exactly this works.
When you whip a target, an invisible gadget is placed 380 / 420 / 460 / 500 in front of you. That gadget will deal the damage in a circle with a radius of 380 / 420 / 460 / 500 units. This means that in a straight line the whip will have 760 / 840 / 920 / 1,000 range. The damage done by the gadget is True damage, and cannot be blocked by Physical or Magic Immunity. The main target is not hit by this gadget; the damage that the main target takes is physical damage, just like a regular auto attack.
The amount of damage inflicted by the gadget is equal to Gladiator's attack damage. When you whip a target, your attack damage is increased by 15 / 30 / 45 / 60. A Logger's Hatchet will not affect the damage, not even to the main target. Attack modifiers and bonus damage from Manaburn, Savage Mace (and Halberds) will still apply to the main target, but not to any other targets. Any attack modifiers are placed on the main target as per a regular auto attack. The damage that the main target takes (depedent on the target's armour) does not affect the amount of damage that the gadget inflicts. Bonus damage from Assassin's Shroud increases your attack damage, and will apply to all targets. Critical damage from Rfitshards multiplies your attack damage by its multiplicand, and will apply to all the targets.
 |
| The creep in front of Gladiator was hit with a level 1, 2, 3 and 4 Flagellation. The creeps with red health are hit by rank 1, orange rank 2 and below, yellow rank 3 and below, and green rank 4 and below. The Pitfall is there for a metric. |
Type: Magic
Range: 1,000
Cast Time: 1.0 Seconds
Mana Cost: 150 / 200 / 250
Cooldown: 100.0 Seconds
Required Level: 6 / 11 / 16
Activation
Summons a Chariot 1000 units behind The Gladiator that travels up to 1000 units infront of where he casted it. Any allies near where it passes have Call to Arms applied to them for 5 / 6 / 7 seconds.
When it reaches the end, it deals 300 / 400 / 500 Magic damage and stuns all enemies in a 400 radius for 1 second.
Rallied! Effects
10% Movement Speed
Damage taken is halved.\nPrevented damage is taken all at once at the end of the buff and is nonlethal.
The Chariot moves at 750ms, and it will always travel 2000 units. This means that the delay until the Chariot reaches its destination is 2.66 seconds. The Chariot will always travel to exactly 1000 units in front of where you were when you casted it.

This means that if enemies are all up in your face, it's going to be difficult to target them with it. This is why good positioning is extremely important with Gladiator, if the enemy gets the jump on you your skills will be a lot less effective (the same could be said of all initiators).
Gladiator Skill build:
- Pitfall / Flagellation
- Flagellation / Pitfall
- Pitfall / Flagellation
- Flagellation / Pitfall
- Flagellation
- Call to Arms
- Flagellation
- Showdown / Pitfall
- Showdown / Pitfall
- Pitfall / Showdown
- Call to Arms
- Pitfall / Showdown
- Showdown
- Showdown
- Stats
- Call to Arms
Part II (Item Build)
Voodoo Jester Hero Guide - Heroes of Newerth(HON) Tutorial
If you played DotA and remember Witch Doctor, you should have an idea how to play Voodoo Jester in HoN. Voodoo Jester is not an easy hero to play, so to own with it you must have skill a practice on your side. This Voodoo Jester tutorial should give you the basics of how to play this hero.
 Voodoo's skills are: Acid Cocktail, Mojo, Cursed Ground and Spirit Ward (ultimate). The most inportant skill with Voodoo Jester is Cursed Ground so it is of most importance to place it well. After you cast Cursed Ground on an enemy hero, the goal is to inflict as much damage as possible. Cursed Ground will inflict damage over 12 seconds according to the damage the enemy hero took while cursed. Even if an enemy hero escapes with low hp he will probably die if you inflicted enough damage on the first seconds of the curse.
Voodoo Jester Skill build
This is the build i recomend:
1. Acid Cocktail
2. Cursed Ground
3. Acid Cocktail
4. Cursed Ground
5. Cursed Ground
6. Spirit Ward
7. Cursed Ground
8. Acid Cocktail
9. Acid Cocktail
10. Mojo
11. Spirit Ward
12-14. Mojo
15. Stats
16. Spirit Ward
17-25. Stats
Some people claim that:
1. Acid Cocktail
2. Cursed Ground
3. Mojo
4. Cursed Ground
5. Cursed Ground
6. Spirit Ward
7. Cursed Ground
8. Mojo
9. Mojo
10. Acid Cocktail
11. Spirit Ward
12-14. Acid Cocktail
15. Stats
16. Spirit Ward
17-25. Stats
is a more helpful build for a babysitting Voodoo since you can use Mojo as a defensive spell healing your lane ally or an offensive combining Mojo with Cursed Ground to get a kill on a more careless enemy.
Personally I like the first build more. It is amazing the stun time you can get if you get 2 enemy heroes alone.
Voodoo Jester Item Build
There are 2 vital items for Voodoo, Shuriken Head for magic immunity this is essential if you don't want to see you ultimate disabled by a stun or silence, and The Staff of the Master because it will make your ultimate bounce into 3 enemy heroes like Moon queen Multi-Strike.
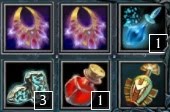 Most of the time it will be upon you to get courier and/or wards while playing Voodoo. Play with your stat items to get them. Remember NEVER leave base without an healing method.
When your items look like this you should own pretty hard:
 The combo will be: Shurinken Head + Acid cocktail + Cursed Ground + Frostfield Plate + Spirit ward
On a perfect world this should grant you at least a triple kill.
But if you don't have the skills or the game is not running in your favor, you should consider building 2 bracelets to improve your life at start. Considering Phase boots is not a mistake, it will help a lot on ganks since you have to place your ultimate on the perfect spot, but Voodoo Jester needs life so it is up to you.
Farming with Voodoo should not be a problem. Try to last hit at least the 1st and 2nd creep from the wave and then just trow Acid cocktail at the rest.
For improvements to this guide just leave the tips on comments bellow ;)

Voodoo Jester Skill build
This is the build i recomend:
1. Acid Cocktail
2. Cursed Ground
3. Acid Cocktail
4. Cursed Ground
5. Cursed Ground
6. Spirit Ward
7. Cursed Ground
8. Acid Cocktail
9. Acid Cocktail
10. Mojo
11. Spirit Ward
12-14. Mojo
15. Stats
16. Spirit Ward
17-25. Stats
Some people claim that:
1. Acid Cocktail
2. Cursed Ground
3. Mojo
4. Cursed Ground
5. Cursed Ground
6. Spirit Ward
7. Cursed Ground
8. Mojo
9. Mojo
10. Acid Cocktail
11. Spirit Ward
12-14. Acid Cocktail
15. Stats
16. Spirit Ward
17-25. Stats
is a more helpful build for a babysitting Voodoo since you can use Mojo as a defensive spell healing your lane ally or an offensive combining Mojo with Cursed Ground to get a kill on a more careless enemy.
Personally I like the first build more. It is amazing the stun time you can get if you get 2 enemy heroes alone.
Voodoo Jester Item Build
There are 2 vital items for Voodoo, Shuriken Head for magic immunity this is essential if you don't want to see you ultimate disabled by a stun or silence, and The Staff of the Master because it will make your ultimate bounce into 3 enemy heroes like Moon queen Multi-Strike.
Starting items:
When your items look like this you should own pretty hard:
On a perfect world this should grant you at least a triple kill.
But if you don't have the skills or the game is not running in your favor, you should consider building 2 bracelets to improve your life at start. Considering Phase boots is not a mistake, it will help a lot on ganks since you have to place your ultimate on the perfect spot, but Voodoo Jester needs life so it is up to you.
Farming with Voodoo should not be a problem. Try to last hit at least the 1st and 2nd creep from the wave and then just trow Acid cocktail at the rest.
For improvements to this guide just leave the tips on comments bellow ;)
Sunday, February 13, 2011
Empath Hero Basic Guide - HoN Tutorial
Empath is the latest Support Hero for HoN realeased by S2Games. They provided on their YouTube Channel a pretty nice Empath Hero Guide as a Hero Spotlight where you have basic knowledge of what Empath can do and how to play her.
In this Empath Hero Guide you will see what skills this hero has and the recommended item builds to make. So if you wonder what items are good for Empath or how to play her, watch this video to have an idea.
In my opinion this is one of the best supporters to have on a gank. Besides is amassing CC(crowd control), that can prevent an enemy hero from escaping, getting help from his allies or provide a save retreat to you and your team mates if you are on the run, Empath can provide trough is ultimate an amazing boost on attack speed , damage and mp, and the best of all is that you will still be able to cast all empath's abilities and item abilities without stopping your connection with your ally.
It is just amazing, be able to get rid of all dot (Damage over Time) or even to get protection on an ally if you are low on life by just "jumping on is back". This is not its propose at all but you need to adapt your self to the game and it most definably fells nice to "run off" a voodoo curse .
In this Empath Hero Guide you will see what skills this hero has and the recommended item builds to make. So if you wonder what items are good for Empath or how to play her, watch this video to have an idea.
In my opinion this is one of the best supporters to have on a gank. Besides is amassing CC(crowd control), that can prevent an enemy hero from escaping, getting help from his allies or provide a save retreat to you and your team mates if you are on the run, Empath can provide trough is ultimate an amazing boost on attack speed , damage and mp, and the best of all is that you will still be able to cast all empath's abilities and item abilities without stopping your connection with your ally.
It is just amazing, be able to get rid of all dot (Damage over Time) or even to get protection on an ally if you are low on life by just "jumping on is back". This is not its propose at all but you need to adapt your self to the game and it most definably fells nice to "run off" a voodoo curse .
Subscribe to:
Posts (Atom)